Showing posts with label food pictures.. Show all posts

Wednesday, November 28, 2012

Gougeres


While preparing to host a small get together, I went looking for a quick, easy recipe for an appetizer and thought to look through Saveur Magazine's 101 Classic Recipes and came across this great recipe for Gougeres (Cheese Puffs). 

Ingredients:

1/2 cup milk
8 tbsp unsalted butter, cubed
1/2 tsp kosher salt
1 cup flour
4 eggs, at room temperature
6 oz Gruyere cheese, grated

I opted for Red Apple Cheese's Apple Smoked Gruyere rather than regular Gruyere.  I'm a fan of smokey flavor whenever possible and the cheese worked very well in the recipe.

Gougeres Ingredients

After heating the oven to 425 degrees, I brought the milk, butter, salt and 1/2 cup of water to a boil in a 4 qt. saucepan over high heat.  Once boiling, I added the flour and reduced the heat to medium. 

Adding Flour

I continued stirring and cooked until the dough had dried a bit more, about 2 minutes.

Stirring the Dough

After transferring the dough to my trusty Kitchen-Aid stand mixer - I added an egg and mixed completely and repeated the steps with the eggs, mixing each completely before adding the next.  The dough was still very warm so I was concerned that I would end up with scrambled egg puffs, but the eggs didn't seem to curdle, or if they did they incorporated into the dough well enough that there were was no visible evidence of the eggs.

Adding the Eggs

Following the addition of the eggs, I folded in the grated cheese (at least the remaining cheese that made it past the taste test phase).

Cheesy Dough, Ready for the Oven

The sticky dough didn't drop neatly - but I got there.  I used Silpat sheets as opposed to parchment paper - but in hindsight, parchment paper would have probably worked a little better.

Heaping Tablespoons of Dough

Once the sheets are placed in the over, reduce the heat to 375 degrees and bake until golden brown - about 30 minutes. It is important to have an oven thermometer to make sure that your oven is at the correct temperature.  I neglected to turn the oven down from 425 degrees to 375 for the first five minutes of baking on the first set, which caused them to finish cooking after 20 minutes.  They were slightly burnt and a bit gooey on the inside.  The second set of trays were baked using the temps listed in the recipe and they turned out much better.  The puffs had a chewy crust that gave way to a terrific, slightly moist interior.  The closest food I could compare it to would be a great french cruller doughnut.  As for flavor, the Gruyere was not overpowering, rather an undertone and the puffs were not as salty as I had expected.

Gougeres - Schuler Version

Gougeres - Saveur Version

It took about 15 minutes of prep and an hour of baking time (it would have been only 30 minutes if I had a few more baking sheets) to make the recipe (which yielded 30  puffs) and they were a hit with my guests.

While the final product was tasty - I'm looking forward to tinkering with the recipe a bit.  I can't wait to try the recipe with some extra sharp cheddar, some gouda or even provolone.  I'm also going to play with the addition of some herbs.  Maybe a provolone and chive cheese puff or a rosemary/asagio puff...mmmm...I'm drooling just thinking about it!

14 down, 87 to go!

Sunday, November 18, 2012

Djaj Mqualli

Djaj Mqualli Ingredients

The next meal in my quest to prepare all 101 Classic Recipes in Saveur Magazines 150th issue is one that may not only be the most adventurous so far, but the hardest to pronounce as well.  Djaj Mqualli is a tangine of chicken, preserved lemons and olives from Morocco and includes a host of ingredients with very distinct flavors including ginger, saffron and coriander.

Djaj Mqualli Ingredients:

3 tbsp. olive oil
5 whole chicken legs
Kosher salt and freshly ground black pepper, to taste
2 large yellow onions, sliced
2 tbsp. ground coriander
2 tsp. ground white pepper
2 tsp. ground ginger
1 tsp. ground turmeric
1/2 tsp. crushed saffron threads
1 1/2 cups chicken stock
6 oz. green olives, cracked
2 tbsp. unsalted butter
1 tbsp. finely chopped parsley
2 tsp. finely chopped cilantro
2 jarred preserved lemons, cut into slices

The first step in preparing Djaj Mqualli is to heat the olive oil over medium high heat in a dutch oven and
brown the chicken legs, turning once, for a total time of about 12-15 minutes.  As with grilling, I always cook meats with the skin or "presentation" side down first.  This way you get a good, quality color/sear on the part of the meat that will be visible.  Letting the skin brown fully until it has caramelized and released from the pan also helps keep the chicken in whole pieces, rather than leaving chunks of skin and meat stuck to the bottom of the pan.


Chicken Legs in Dutch Oven

As I noted in the my previous post for Chicken with Forty Cloves of Garlic, I often have the habit of not browning meats enough in the beginning of a recipe and get lackluster results in the final product.  For this dish I browned the meat beyond the point that I normally would, hoping that the final product would have more color and flavor.


Browned Chicken Legs

Once the chicken legs had been fully browned, I set them aside on a plate and placed the chopped onion into the dutch oven and sauteed them until they were soft and golden.


Sauteeing Onions and Spicest

Once the onions had been cooked, I added the combination of spices and stirred them to fully integrate them into the onion mix and cooked for an additional two minutes.

One of the spices that Djaj Mqualli contains is saffron, the stigma of the saffron crocus flower and is extremely expensive.  From www.Penzeys.com:  "Saffron is so valuable because it is a very labor intensive crop, and only 5-7 pounds of saffron can be produced from each acre of land.  This makes saffron the most expensive spice by weight - it always has been- but by use, saffron isn't that expensive because a little goes a long way."  Saffron is available in most area supermarkets, but it is pricey.  The photo below is the package of saffron that I purchased from Budwey's for $7.99.  It looks pretty good right? A big bowl of saffron, almost a little like orange-red spaghetti.  However...


Big Bowl of Saffron?


pictured below is the same container, with my wedding ring (size 13) for comparison purposes.  The saffron pictured is approximately a gram of saffron, but enough for at least 10 recipes.
 
Saffron Next to my Wedding Ring

Once the spice mixture had been fully incorporated into the onion mixture I put the chicken legs back in, spooned the onion mixture on top of them and baked them in a 350 degree oven, covered for 40 minutes.  


Tangine Heading into the Oven

After the allotted time, I stirred in the olives, butter, parsley, cilantro and preserved lemons into the pot and returned to the oven for another 5 or 6 minutes.   


It's suggested that the Djaj be served with rice or flatbread and I opted for rice (but wished I had some flatbread).  There are a lot of strong flavors in this dish that could fight to over power each other (green olives, saffron, cilantro, onions, preserved lemons), but the slow roast of the onions certainly mellowed their flavor and the cilantro, green olives and lemons seemed to play well off of each other.  The lemons are preserved in brine and deliver not only sourness, but a salinity that kept up with the olives.  The sour flavor of the olives and lemon, was complimented, but not covered, by the distinct savory flavor of the cilantro.  Kim (everyone pretty much knows she's my wife at this point...right?) is not usually a huge fan of chicken legs and thighs, cumin, coriander, cilantro or green olives, but because the chicken was so tender, basically falling off the bone and because the other flavors of the meal were so bold that they covered up the offensive ingredients, she didn't notice them in the meal and she enjoyed it.


Djaj Mqualli - Schuler Version

Djaj Mqualli - Saveur Version
Credit: Todd Coleman

While I would have given Djaj Mqualli a 7 or 8 out of 10 on the night that I made it, it was so much better when I had the leftovers for dinner the next day.  The flavors had melded and mellowed even more and the chicken was so buttery that I had to stop short of gnawing on my fingers as I ate it.

One final warning though about saffron. Saffron tends to vibrantly color everything that it comes in contact with, like my cutting board, my counter and even one of my dishes.  While eating this, if you go native and eat with your fingers, be prepared for yellow finger tips and possibly even lips, but oh, it is so worth it!

Lucky # 13 down, 88 to go.


Thursday, November 15, 2012

Salmorejo

Salmorejo Ingredients

As winter begins its slow but sure descent into our lives, it seems that that the darkness of the evening creates a dour and sullen mood, even in the early days of November.  I thought that I would try to brighten the mood of a Sunday night by making a bright, summery dish, Salmorejo.  Salmorejo is a Spanish puree of tomato, bread and other ingredients served chilled.  Think a thicker, more robust take on gazpacho.  The recipe was simple and I found the method of "cooking" the soup very interesting.

Ingredients for Salmorejo:

3 tbsp. Kosher Salt, plus more to taste
8 plum tomatoes, cored, halved and seeded
1 clove garlic, crushed
1 baguette (about 10 oz) cut into large onions
1/2 small yellow onion
1 cup extra-virgin olive oil, plus more for drizzling
 2 tbsp. Sherry Vinegar
Freshly ground black pepper, to taste
3 hard boiled eggs, chopped
1 1/2 cups chopped Iberian ham or prosciutto


Onion, Garlic, Tomatoes and Bread (Pre-soak)

The first step was to place the tomatoes, onion, garlic salt and bread into a large bowl, cover with boiling water and let steep for 1 hour.

Nothing beats a good soak.

Then I drained the vegetables, reserving a cup of the liquid and place back into the bowl and squeezed the water out of the bread and place into the bowl as well.  Warning, even thought the bread had set for an hour, it was still very hot. Squeezing the water out was also difficult to do by hand.  The bread would squish through my fingers as it relentlessly held water.  I also attempted putting the bread in a colander and sieve, but got similar results.  I had some success pressing the bread between layers of paper towels, but it took quite a few paper towels.  Not very budget or eco-friendly.

Onion, Garlic, Tomatoes and Bread - soaked and drained

Once the bread was semi-dry, I placed it in the bowl with the vegetables, olive oil, the reserved liquid and vinegar.  The original recipe called for the mixture to be combined in a blender, but I used my immersion blender to render the bowl of chunky, juicy mush into a thick, velvety soup that at room temperature was fantastic.  If the soup was that good prior to the final product, this recipe couldn't miss.  I seasoned liberally with salt and fresh ground pepper and chilled it for an hour.

Blending while scraping the bowl to get a smooth consistency.

Following the chill, the soup was poured into bowls and garnished with a drizzle of olive oil, chopped egg and ham.  The soup had a good flavor, very fresh thanks to the barely cooked tomatoes and onion.  The pureed bread gave it the thick consistency, which in combination with the olive oil, caused the flavor from each sip and slurp to quickly spread across your tongue.  Thought the flavor was good (even better on day 2, once the ingredients further integrated, creating a deeper flavor), this was only the second or third time I had experienced a soup served cold and it seemed like my brain and mouth could agree that it was a good thing. 

Salmorejo - Schuler Version

Salmorejo - Saveur Version
Credit: Todd Coleman
I'd like to try this recipe again during a hot summer day in my backyard with a refreshing cold beer and the smell of  grilling meat wafting through the air.  This might be a case of right recipe, wrong time of year.  Having this recipe however made me want to make the Cream of Tomato Soup recipe that is also part of the 101 Classic Recipes list - more on that in the next few weeks.

12 down, 89 to go.

Tuesday, October 30, 2012

Beef Stroganoff

Beef Stroganoff Ingredients

Growing up, everyone has certain food or dishes that become staples in the family menu and get passed on from generation to generation.  In the Schuler household we had several. Rice Ole, Creamed Chipped Beef on Toast, Turkey Casserole with Cranberry Pinwheels and of course, the creamy, beefy, noodle-y masterpiece, Beef Stroganoff.  The version that we enjoyed in our family consisted of hamburger, onion, mushrooms and sour cream cooked up and served over buttered noodles.  When I first saw "Stroganoff" on the list, I was excited, but this version is bit different than the one I grew up on, substituting matchstick potatoes for noodles, beef tenderloin for hamburger and without mushrooms.

The ingredients for this version of the recipe are:

4 tbsp. unsalted butter
2 tbsp. flour
1 tsp. dry mustard
1 cup beef stock
1/4 cup sour cream
1 small yellow onion, thinly sliced
11/2 lb beef tenderloin, cut into 3" x 1" x 1/2" slices
Kosher Salt and fresh ground pepper to taste
Canola oil, for frying
4 russet potatoes, peeled and sliced into 1/8" matchsticks
2 tbsp. finely chopped parsley.

As with many recipes, in order to get the dish done properly, you have to be able to multitask efficiently.  You must create a roux and the sauce; peel, slice and fry the potatoes, cook the beef and onions and then bring everything together.  Usually not a big issue for me, but through in taking notes and pictures...and we have a party! 

Matchstick Potatoes In Progress

First on the agenda was to peel, slice chop the potatoes into matchstick potatoes.  After chopping them, I put them between paper towels to draw out a bit of the excess moisture.  A trick to crispy matchstick fries is to make sure they are as dry as possible, and placing them into oil that is properly heated.  I poured the oil to a depth of about 1 1/2" in a dutch over and heated to 375 degrees.  Working in batches I fried the potatoes up until they were golden and crisp (about 5 minutes).  It took me a batch or two to figure the right amount of potatoes to put in at once (about a cup and a half) as when you put too many into the oil at once, they drop the temperature of the oil down faster than the burner can heat it, not only slowing down cooking, but slowing the frying process, resulting in a greasy fry.  When the potatoes were done cooking I removed them with a metal slotted spoon and placed them on paper towels to drain, then sprinkled them with kosher salt.

Sour Cream Sauce

While the potatoes were frying up, I took 1/2 of the butter and melted it in a saucepan and added the flour and dry mustard, cooking for about two minutes.  If you like a nutty flavor to your sauces, continue cooking the roux (flour and butter mixture) for another 30 seconds to a minute and it will start to brown a bit.  I then added the chicken stock slowly, whisking constantly.  I brought that (basically chicken gravy) to a boil and cooked until it thickened a bit, and mixed in the sour cream.  Once the sour cream was fully incorporated, I took it off the heat and set it aside.

So Much To Do at Once...Potatoes, Onions and Sauce Cooking.

With the sauce under control, I sliced the onions and sauteed them in the remaining butter  until soft and a bit caramelized (about 6 minutes).  With the onions underway, I sliced the beef and placed it in the pan, cooking until the bits were cooked to about medium.  When you make stroganoff with hamburger, you have to cook it completely, but with the beef, I figured that it would continue cooking in the sauce for a bit and I wanted to make sure that it was cooked enough to eliminate the blood that may still be in the meat, but keep it from overcooking in the sauce and make it tough and stringy.

When the meat was cooked, I emptied the saucepan into the skillet and brought it back up just below a boil.  I plated the dish by placing the beef and sauce mixture on the plate, setting a handful of potatoes on top of it and then sprinkling with parsley.


Beef Stroganoff - Schuler Version

I had the same problem with this stroganoff that I had with the version that my mother made, I couldn't get enough!  The meat turned out just right, tender and moist.  The sauce had that fantastic sour cream tang, but deeper flavors thanks to the onion and dry mustard.  The potatoes were OK, but in a next round, I would slice the matchsticks smaller.  Mine ended up being more like fries than matchsticks (see pic above).  I still prefer noodles though.  I did miss the mushrooms, which would be easy enough to add into the recipe.
Beef Stroganoff - Saveur Version
Credit: Todd Coleman

My dining companions (Kim and my sister Brooke) were big fans of the meal.  Enough that we had no leftovers.  They enjoyed the flavor and Kim was especially happy to not have to pick out mushrooms from her dinner.

Another recipe in the books, and again, a recipe that I will make in some form again in future.  Next on the list - my first ever attempt at Indian Cuisine - Saag Paneer.  Should be interesting!

8 down, 93 to go.

Sunday, October 14, 2012

Elvis Presley's Pound Cake

This blog post for certain has to be dedicated to my family.  My stepfather and sister are huge Elvis Presley fans.  They may not be the biggest fans in the world, but they are most certainly the biggest ones that I know.  I am a casual fan of his music, and was forced to watch his movies at a young age (there is only so much Blue Hawaii that someone can take), but I can safely say that I am more of a fan of his taste in food than I am anything else.  There are a bunch of "Elvis" Cookbooks including "Are You Hungry Tonight?" and "All Cooked Up: Recipes and Memories from Elvis' Friends and Family" and I'm sure they include recipes like "Hunka Hunka Burning Chili" and "Ain't Nothin' but a Hot Dogs", but supposedly one of his favorite sweet treats was this Pound Cake recipe from his child hood friend Janelle McComb.

The recipe itself (as found in the October '12 Saveur Magazine - click here for the recipe on Saveur.com) is simple (7 ingredients - unsalted butter, cake flour, sugar, vanilla, kosher salt, eggs and heavy cream) and even I had no issues producing a two fantastic pound cake loaves.  That may sound a little self deprecating, but I have issues baking.  I'll expound on that in a future post.

Elvis Presley Pound Cake Ingredients

I gathered the ingredients - letting the eggs, butter and cream come up to room temperature (having learned my lesson from my Spaghetti Carbonara experience) on the counter.  I greased two loaf pans with unsalted butter and sprinkled them with cake flour, setting them aside for later.

Loaf Pans - Buttered and Floured

Another best practice that I'm trying to adopt from other experiences in the 101 Recipe Challenge is to use the exact ingredients listed on the recipe.  In my initial recipe, Kibbeh, I used regular grind bulgur instead of fine grind and it affected the final dish.  The Elvis Presley Pound Cake recipe called for cake flour which I had never heard of.  I figured that it was to flour what confectioner's sugar was to table sugar.  Come to find out,  that couldn't be farther from the truth.  Cake Flour is a low protein flour, usually around 8%, made from a softer winter wheat.  Because of its low protein composition, when it is used in a recipe, less gluten forms in the dough or batter, creating a smooth texture with a finer crumb than recipes using all purpose flour.

After prepping the pans and starting up the oven (350 degrees...of course) I pulled out another of my beloved kitchen tools, my Kitchenmaid Stand Mixer.  To quote Ferris Beuller "So Choice.  If you have the means, I highly recommend that you pick one up."  Honestly, I love that thing and don't use it nearly as much as I should.  I put the softened butter, sugar and salt in the bowl and beat at 1/2 speed for six minutes, until the mixture was pale and fluffy.  I then added the eggs one at a time, beating well and scraping down the sides of the bowl between each. 

Batter in Mixer - beating in eggs individually.

I then added the flour and cream, alternating between the flour and cream, making sure to begin and end with the flour as the recipe called for.  I believe I added a cup of flour and 1/2 a cup of the cream at a time.  I then followed the direction to increase the speed to high and beat until light and fluffy, about 5 minutes.

The batter was unbelievably light and fluffy.  Between beating each egg into the batter individually, then beating it for a full 5 minutes on high with heavy cream in the batter, it had become the consistency of slightly loose whipped cream.  The taste was heavenly, almost like a vanilla mousse and it melted on my tongue.  If the final product was half as good as the batter, I was in for a treat.  As it was my family fell all over themselves to be the first to get a lick off of the rubber spatula and whisk attachment for the mixer.

Sifting Flour into the Batter

You may ask...why the sieve?  The recipe called for the cake flour to be sifted and I do not have a sifter (uni-tasker), so I used my hand sieve to sift the flour when adding it to the batter.  Then I divided the batter between the two loaf pans and smoothed the tops with a rubber spatula. 

Pound Cake, Ready for the Oven

The loaf pans went into the oven for about an hour and 15 minutes, until a toothpick was inserted and came out with a little crumb sticking to it.  The recipe called for letting the loaves cool, in pan, for 30 minutes, then cooling them completely until slicing.  Well, I can assure you that that did not happen.  They sat in pan for 30 minutes and cooled for about 5 after I took them out of the pan, but that was all I could take.  I cut a few slices and though the smell had been great in the kitchen while it had been baking, the smell was 100x better after it was sliced.  A thick, sweet smell with traces of vanilla and warm butter that made me a happy man.
 
Post Oven Pound Cake - Yummo!
Elvis Presley's Pound Cake - Schuler Version


Elvis Presley's Pound Cake - Saveur Example Photo

 The cake was very dense, but not heavy, with a very fine crumb.  The texture was very smooth and even the crust seemed to melt in my mouth.  To be sure, the cake was sweet, but not overpoweringly so.  You taste the vanilla almost as an undertone, but it is distinct.  I will make this recipe again, but using a higher quality vanilla as opposed to the private label Aldi's version.  I think the flavor profile would change and you would get a much more complex flavor from a better vanilla. Sometimes when you have pound cake, you need to have some sort of accompaniment (fruit, ice cream, rum, etc) because the cake itself isn't remarkable.  My friends, this pound cake has entered my system unadulterated every time that I've eaten it.  It is so tasty that anything with it, I believe, would be distracting.

You really need to make this recipe...really.

I will be making this recipe again....and again and again.  I think that it might actually become my go to dessert, or possibly SPOILER ALERT FOR MY FAMILY AND FRIENDS the bulk "Christmas Gift" that I make for everyone this year.  But don't call me cheap until you try it.

4 down, 97 to go!

Wednesday, October 3, 2012

Peanut Butter Cookies

As I continue to catalog the ingredients for my 101 recipe challenge (see original post), which is taking much, much longer than I originally thought it would, I am trying to continue to make recipes to keep myself on a pace of at least 2 a week to make my deadline of August 3rd.  I will have to make 3 dishes during some weeks, but until I get ahead of myself in preparation, 2 should keep my head above water.

I had originally planned, and purchased ingredients for, Senate Bean Soup but life has gotten in the way a bit and I haven't had the time needed to prepare and enjoy the soup.  Sure, I could have made it at 10:30 at night, but that's not the best time to have dinner.  I had planned to make it over the weekend, but instead I had the opportunity to make a dessert for a football party at a friends house (Go Pack Go).  I chose to make recipe 84 - Peanut Butter Cookies.

This recipe for peanut butter cookies was pretty standard (flour, baking powder, salt, sugar, brown sugar, butter, eggs, peanut butter, vanilla) and it took me about an hour and a half to make a batch.

Peanut Butter Cookie Ingredients

The recipe first calls for whisking together the flour, baking powder and salt and setting aside.

Flour, Baking Powder and Salt - Whisked

Next, using an electric beater, I combined the sugars and butter, beating until fluffy (about 3 minutes).  First - 3 minutes seemed like an awful long time, and second, I'm not sure if I would have classified the result I got as "fluffy".  Mine ended up more like the consistency of wet sand.  Honestly, I probably could have made mud pies out of it.  Delicious, buttery mud pies, but mud pies none the less.

Getting ready to cream the sugar


 I then added the eggs, one at a time, beating thoroughly adding each.  Then the peanut butter and vanilla, beating until they were combined.

Cookie dough, re, mi

Taking a tablespoon, I took the dough and made dough balls that ended up being about 1 1/2" in diameter.  I placed them on the cookie sheet with 2" separating the dough balls and pressed them with a fork making a criss cross pattern.


Criss Crossing Some Cookies

Off they then went into my semi-faithful oven, preheated to 350 degrees for 12 minutes, with a rotation of the tray halfway through the cook time.  The recipe called for parchment paper, which I did not have, so I cut the bake time by a minute to make sure they didn't get too browned on the bottom.

As the cookies came out of the oven, I couldn't keep them in the kitchen.  As soon as they were even close to cool, my wife and kids started to grab one whenever they walked though and I'm sure that they made a few extra trips.  The cookies were nice and chewy, with a peanut butter flavor that was satisfying, but not overpowering.  The cookies had a little bit of buttery flake on the edges, a little like a pie crust.  The recipe I usually make calls for a dusting of granulated sugar on the dough balls prior to pressing with a fork, so these cookies were slightly less sweet than I would have liked.  Kim (my wife) rated them 7.5 out of 10.  A Hershey's kiss planted in the center of the cookie would have probably landed me a 10 (her all time favorite Christmas cookie is the Peanut Butter kiss).

Peanut Butter Cookies - Schuler Version
My Peanut Butter Cookies
Peanut Butter Cookies - Saveur Version
Saveur Peanut Butter Cookies
The only issue that I really had with the cookies was in the days after I made the cookies.  They dried out a bit and became really crispy - almost like shortbread cookies.  They didn't taste any worse, but I am more of a fan of chewy cookies than crisp cookies.  It may have been due to not having the parchment paper, or possibly just how these cookies "age".  Maybe they don't usually last that long.

Another idea for these would have been to make a Peanut Butter Cookie Sandwich by slathering on some strawberry preserves and finishing up with a second cookie.  Mmm...will have to try that next time.

I'd love to get your favorite Peanut Butter Cookie trait, story or obsession.  Feel free to post!

I've picked a few recipes and ingredients for the next week - in no particular order: Chicken with 40 Cloves of Garlic, Senate Bean Soup, Egg Cream Soda, Spaghetti Carbonara and Elvis Presley's Pound Cake.

I will also post some interim items based on the fun things I find during the cataloging process (like the inordinate amount of eggs and onions I will be using) and the planning process.

Two down, ninety-nine to go!

Saturday, September 29, 2012

Let's Get It Started - Kibbeh

Over the course of the past few days I have been working on information compilation for my 101 Recipe Challenge (see original post). I am determining the quantities of non-perishable items that I might be able to purchase in bulk and figuring out recipes that may use the same ingredients so I might be able to make them at the same time, or within a short time frame.  As well, I have been trying to find a feasible deadline is for this endeavor.

I've decided that the deadline is August 3, 2013, 308 days from today and my 11 year wedding anniversary.  The plan is to make the items that are my wife's favorite from the entirety of the challenge, then make Baked Alaska for dessert.  It seems like a romantic end to the challenge - and a fitting thanks to my wife for tasting 101 wonderful (but possibly horrible...depending on how they turn out) dishes.

As I wrote the family shopping list for the week last night, I decided that I needed to get this challenge started.  As you may remember, I let my wife have the honor of picking the first item to be prepared.  She flipped through the magazine (Saveur, October 2012) looking at pictures and said, "That looks good".  Pointing to Kibbeh, Beef and Bulgur stuffed meatballs from the Middle East.  An interesting choice, seeing that it had no less than 3 ingredients that I have never used before (bulgur, lamb and sumac) and some spices that I didn't even know how to locate (sumac).

Kibbeh consists of an outer shell (fine bulgur, lamb, allspice, cinnamon, salt, pepper, onion) stuffed with a cooked meat mixture (onion, sumac, ground sirloin, allspice, cinnamon, sumac and pine nuts).  As a family, we primarily shop at Aldi and I knew that they would more than likely not have many of the items in the recipe in their inventory.  I did however have more success at the grocery in my neighborhood where I found ground sirloin patties on sale, lamb steaks and the allspice.  After finding those items, the hunt began for sumac.  The berry of a shrub found primarily in the Middle East, sumac creates a sour, yet fruity taste in dishes.  The majority of my morning was spent in my local Tops, Tops International and Wegmans hunting for this lovely ruby powder.  After hunting through aisles of spices, powders, international foods and asking at least 10 employees most of whom had no idea what I was talking about, I walked into Spice Bazaar on the corner of Sheridan and Bailey,  stepped up to the counter and asked.  Without looking up from the text he was composing, the shopkeeper said, "sure", took two steps to his right and grabbed it off the shelf (and a deal for only $2.99...now to find more recipes with sumac).

Spice Bazaar is now my first phone call when I try the other Asian, Indian or Middle Eastern recipes (tamarind paste anyone?)

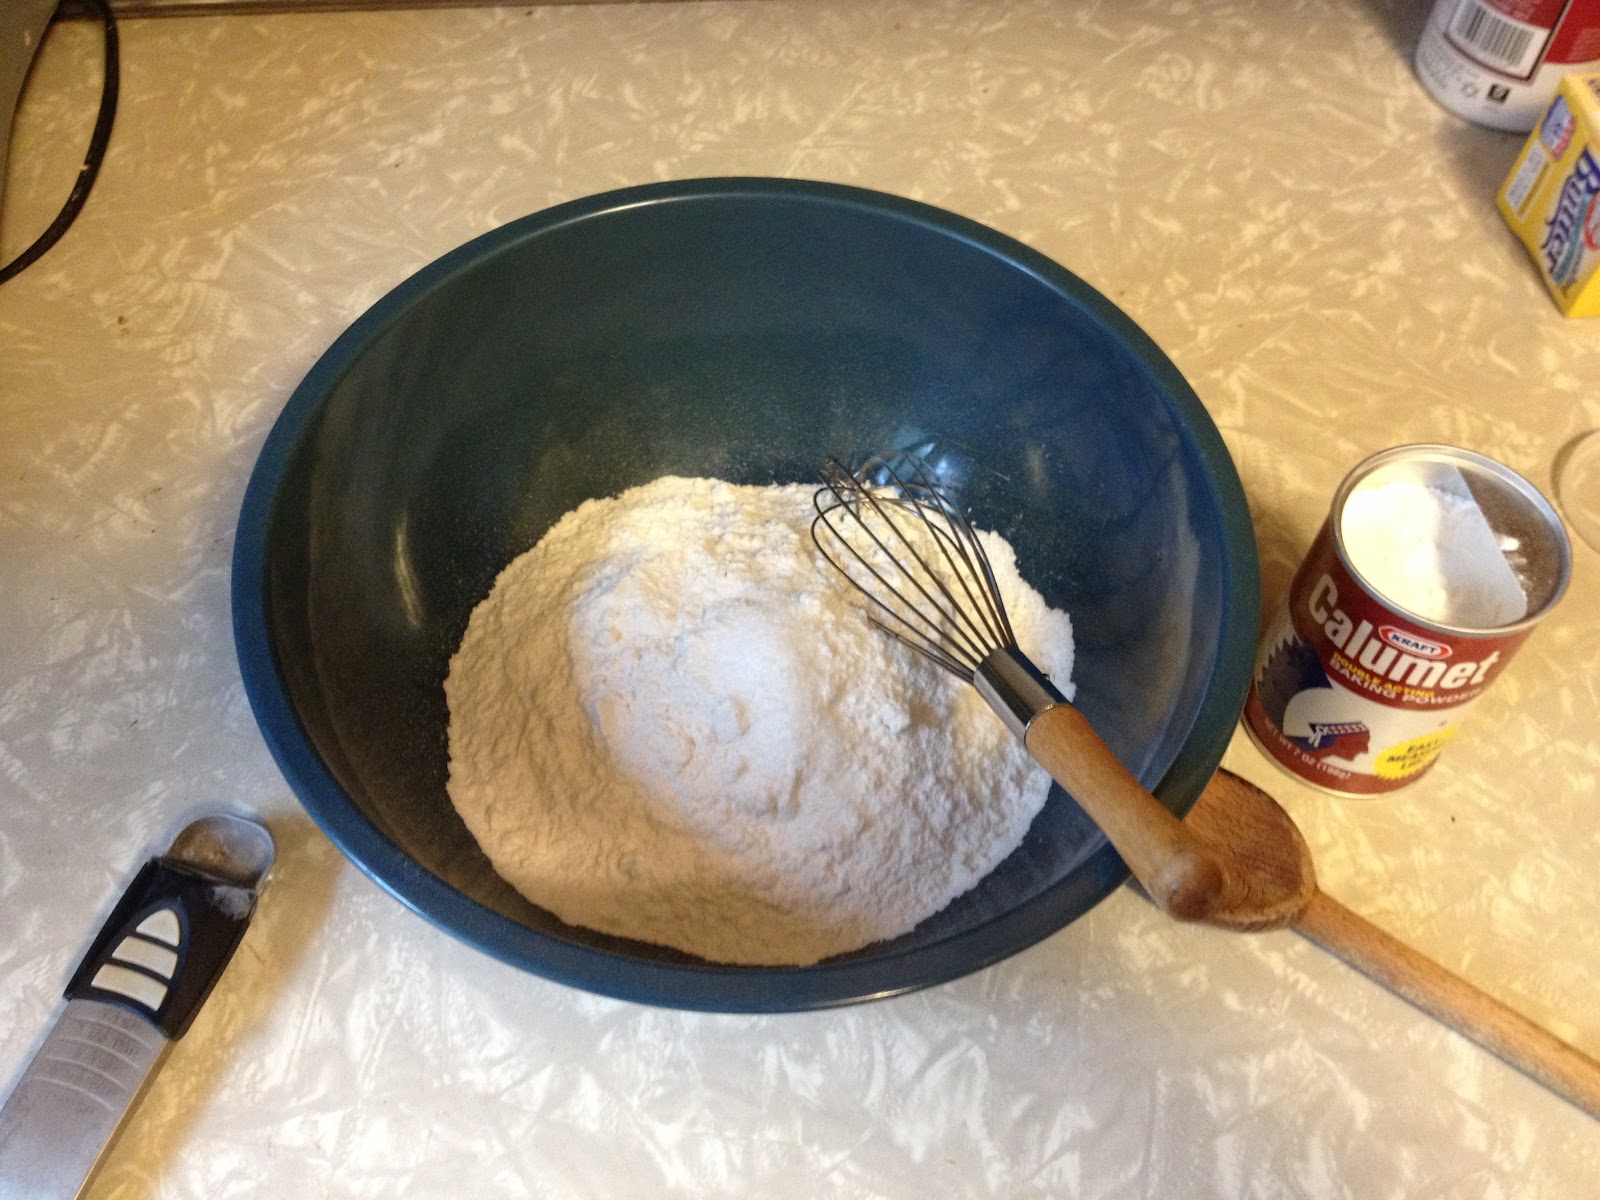
I assembled the ingredients in my kitchen, as well as my favorite tools of culinary battle.


I'd like to introduce you to two of my faithful companions that will help see me through this challenge.  The 12" cast iron skillet has been with me for the past seven years and has seen plenty of fun, as has the wooden spoon, which I've had long enough for it to have indents where I hold it as I stir.  I hope to hand them both off to one of my children someday...probably the worst heirloom ever.


The first few steps of the recipe were pretty standard - saute onions in olive oil, add ground sirloin (I opted for pre-formed patties that I broke apart rather than grinding my own).  After the meat was nice and browned, I added in allspice, cinnamon, salt and pepper.  As the spices warmed up, the kitchen filled with the most incredible scent.  A little like a meaty, savory Christmas...honestly.  I'm not sure if it was the allspice or the cinnamon, but it was fantastic.


Once the ground sirloin was finished, I transferred it to a bowl and added the sumac and pine nuts.  As a kid, I remember playing in bunches of trees in the fields near my house that we called "sumac trees", and once or twice I had taken a taste of the "sumac berries" having been told that American Indians had made tea or eaten them at a time before this area was settled.  I recall a lemony taste, sour with a bit of tartness.  While that sumac (staghorn sumac) is not the same sumac I used in the recipe, it is a near cousin.  I took a bit to taste and it was not exactly the same, but close.  This flavor was much more refined and complex, more tart than sour, with a fruity undertone.  Being a former cook and wannabe chef, I am a big fan of tasting not only the ingredients, but also the portions of the recipethroughout the process of cooking a dish and the stuffing was fantastic.  The onion had softened nicely and imparted a sweet undertone to the meat mix, while the higher end tart/sour flavors of the sumac complimented the sirloin.  There was a nice finish to the bite with the toasted pine nuts as well.

The next step listed was to grind the lamb twice.  I used lamb blade chops rather than a lamb roast or loin, so I deboned the chops, then ran them through the food processor (I don't have a grinder and while it is always fun buying new kitchen equipment, I can't see multiple uses for a grinder and I share Alton Brown's view on single use kitchen equipment).


I then ran the bulgur through the food processor because the recipe called for fine bulgur and in my hunt for ingredients, I was only able to locate "bulgur", which didn't look so fine!  I then added the chopped onion and spices and as per the recipe kneaded the mixture for about five minutes until it became a pliable, somewhat uniform paste.

Kibbeh, meat stuffed meatballs in essence, require a bit of technique to put together.  The recipe made 16 meatballs and it took me at least five to get the hang of the stuffing.  One of the primary elements is a bowl of water that I would periodically dip my hands in to keep the mixture moist.  I took about 1/4 cup of the lamb  mixture and formed a ball, then inserted my index finger into the center and slowly pressed the sides and bottom of the meat ball into a thin walled cup, fixing tears in the walls by wetting my fingers and pressing the sides of the tears together.  Sort of like a funky smelling play doh.  I filled the hollow that I formed in the lamb with the beef mixture, then pressed the sides edges together while pushing down gently on the filling, sealing the edges with a bit of water.  Once I got into a rhythm, the process was kind of calming.  The downside of handling raw spiced meat for that long though was that it took a few hours to get the smell out of my hands and lamb fat seems to be very difficult to wash off.  It would probably make a good waterproofing agent.  I tell you, if my wedding ring fell of once it fell of 10 times.


 As I rolled and stuffed I heated six cups of canola oil in a dutch oven.  I didn't have the opportunity to purchase a fry thermometer, so I defaulted to a comparison that I knew during my days as a prep cook at Bennigan's.  I grabbed a tortilla shell from the fridge, cut it into wedges and put some into the oil when it came close to what I thought would be 375 degrees.  Remembering how the tortilla chips I prepped reacted to the oil, when I got close to the approximate cook time that I used to expect (about a minute) I figured the oil was close enough.  Working in batches I cooked the kibbeh.  I placed 4 of the meatballs into the oil, after two minutes I turned them across the bottom of the oven from left to right, then put 4 additional meatballs in.  I cooked the flipped meat for two more minutes, then removed them with a slotted spoon and placed them on a paper towel lined plate to drain.


 As per the serving instructions, I plated with yogurt drizzled with olive oil and a sprinkle of sumac.  I cut open one of the meatballs to sample and found the first bit fantastic.  The tart and semi-sweet filling was a soft texture, mixed in with the bulgar/lamb shell, which had a firmer, almost crunchy texture which was complimented by the sour tang of the yogurt.  I had to eat two, just to make sure they were "consistent".  From start to end, the entire process took me 2 hours.  Because I was not sure of how long the recipe would take me to prepare, I made it during the day knowing that I would refrigerate them and re-heat them for dinner.

My Kibbeh

Example from Saveur Magazine

My wife is my has undertaken a portion of the challenge with me, having agreed to taste every recipe that I make.  Growing up, her family of seven were purely meat and potatoes family, every night, without much exception or a whole lot of international influence (save the holiday traditions that her grandparents brought from Eastern Europe).  Not that I was an adventurous eater as a kid - the majority of my childhood meals were casseroles that I put into the oven when I got home from school.  Heck, I thought everything was cooked for an hour at 350 degrees for the first ten years of my life.  My wife also has an aversion to condiments with the exception of BBQ sauce, but I'm sure that will come up over the course of the blog.
 
I was hesitant with giving my wife the kibbeh (I tried to get the kids to taste them...didn't get far), but served it with peas and brown rice.  She enjoyed it, especially the different textures that it involved.  She wasn't a huge fan of the yogurt, but on a scale of 1-10, she gave it a 6.5/7.  Not too shabby.

A few things that I would do differently for this recipe:
  • Use ingredients as they are listed in the recipe - You can see in the comparison pictures of my kibbeh and the magazine picture, that the bulgur is kind of poking out of mine.  They look like porcupine balls.  If I had used fine bulgur, this may not have happened.
  • Don't overcook the meat - I may have overcooked the stuffing.  It was not as juicy as I expected it to be and definitely didn't have the same color as the example, which leads me to...
  • Buy a fry thermometer - a cook is only as good as the tools that he uses.  I may have been frying the kibbeh at 450 degrees for all I know.
  • Don't expect the recipe to hold up after re-heating.  Don't get me wrong, they are still good (I've been eating them for two days now) and the flavors have only combined more since I made them, but they dry out in the microwave and seem to be missing some sort of sauce.
A few things that I have learned about the process:
  • I need to find the ingredients for the more complex recipes over the course of a few weeks, rather than spending five hours hunting around Western New York for one ingredient.  Of course - now that I have the number for Super Bazaar - it will be my first call every time.
  • I need to pace recipes out by "difficulty".  I need to complete a recipe every 3 days and I need to make sure I don't get caught with a whole bunch of difficult recipes in at the end, or I won't finish within my given time frame.
 I'm interested in experience that others have had with kibbeh and with cooking international cuisine in your home.  Please use the comments for any tips or tricks!  Any help is always appreciated.

 One down, one hundred to go. 

Next:  Senate Bean Soup