Showing posts with label dessert. Show all posts

Sunday, November 11, 2012

Sweet Potato Pie

Sweet Potato Pie Ingredients

In my last post for Joe's Special, I griped about how it was hard to be on a low carb diet and try to make as many of the 101 recipes as possible.  When I wrote that post, little did I know that I was standing on the bring of the sugary abyss known as Halloween.  Halloween came and went, and with it almost all of what willpower I had.  For the past week and a half I have fallen off the wagon and as usual, when I fall off, I fall off hard.  I've gone from virtually no sweets and starches to enough to choke a rhino.  From the kids' Halloween Candy to breakfast cereal to rolls with meals and of course desserts.  Since I  had caved to my inner urges already and my in-laws were in town, I decided to make a special meal of Chicken Stroganoff (a modified version of  the Saveur Beef Stroganoff recipe, using chicken and noodles instead of beef and matchstick potatoes) and Sweet Potato Pie

I'm not usually a big fan of pie, so it is not a big surprise that I had never had Sweet Potato Pie, but with the exception of throwing a Rich's pre-made frozen pie into the oven at my first cooking job (Don's Groceries in Royalton Center) I had never made any kind of pie.  This recipe was fairly simple and, spoiler, tasted fantastic.

Sweet Potato Pie Ingredients:

 1 3/4 cups flour
8 tbsp. unsalted butter, cubed and chilled, plus 8 tbsp. melted and cooled
1 tsp. Kosher salt
2 cups boiled and mashed sweet potatoes
1 cup sugar
1/2 cup evaporated milk
1 tsp vanilla extract
2 eggs, lightly beaten

In the entry for this recipe, Jane and Michael Stern, SAVEUR contributing editors note that this recipe comes from Mrs. Bonner, a cafe owner in Crawfordville, Georgia.  The secret to the bright color of the pie is that the sweet potatoes are boiled rather than baked, leaving them bright orange. 

Though I haven't made Sweet Potato Pie, I have made plenty of sweet potatoes.  Mashed sweet potatoes were a favorite of the kids when they were younger and still a staple at the holiday table.  When making sweet potatoes, many people peel, then cube and boil them, but I find it much easier to boil them whole first, cool them a bit and then peel them.  I put six medium sweet potatoes in a stock pot and covered them with water over high heat.  Once boiling, I lowered the heat to medium and let cook for 30 minutes.

Sweet Potatoes - Pre-boil

While the potatoes bubbled away on the stove top, I placed the flour, cubed butter and a 1/2 tsp. of salt in my food processor and pulsed until pea sized crumbles formed, then added 1/2 cup of ice cold water and pulsed a few more times until a dough formed.

Pea Sized Dough Crumbles
I scooped the dough out of the food processor (first unplugging it from the outlet and removing the chopping blade - I like all 10 of my fingers) and formed a nice softball sized ball of dough.  I placed the ball on a floured surface and formed a dough disc that I wrapped in plastic wrap and popped into the refrigerator for a half hour to chill.

Pie Dough Disc

With the dough in the fridge, I microwaved the remaining butter until it had melted.  I've found that when I melting butter for baking that if I melt on high heat it gets too hot and takes quite a long time to cool.  I usually put it in the microwave for 45 seconds at 50% power, which gets the butter just about melted and the residual heat (with the help of a quick stir) melts it completely.  That way it is at a lower temperature and fully cools in less time.

A short time later the potatoes had finished cooking and I quickly placed them in an ice water bath to stop the cooking process.  Once cooled, all that is needed is a quick, shallow slice down the middle of the potato and the skins pop right off when you apply a little pressure with your fingers.  I made about 3x the amount of potatoes needed for this recipe, figuring that I could use them for dinner the next night, saving me prep time.

Boiled Sweet Potatoes Peel Easily
  I gave the potatoes a thorough mashing (nothing is worse than potato chunks in your mash - whether it be white or sweet potatoes) and hand whisked in the melted butter, eggs, evaporated milk, sugar and vanilla, continuing to mix until it was nice and smooth.

Sweet Potato Pie Filling Ingredients

The timing was perfect as 30 minutes had elapsed since I had put the dough in the fridge.  I started pre-heating the oven at 375 degrees, took the dough out and quickly rolled it out on my floured counter top.  If you want a flaky crust it is important to handle the dough as little as possible and to keep it as cold as possible.  By doing this you limit the amount of gluten that is produced in the process (the protein that makes bread so wonderfully chewy, but not very helpful in creating a flaky pie crust).

Rolling, Rolling, Rolling

It is not vital that you roll the dough out to a perfect circle.  I tried to figure out what the outline of my dough looked like and came up with either the Millennium Falcon or a Rorschach Test.  It is important thought to make sure that you roll it out until it is an 1/8 of an inch thick and that you place your pie tin upside down on the dough to make sure you have about 2 inches extra dough around the tin.  It's discouraging to have to start rolling it out again if you find that you haven't rolled it out enough.

Millenium Falcon?

Once rolled out, fold the dough in half, gently, then pull on top of the pie tin and unfold.  Lightly press the dough into the tin, making sure to push out the air that might be trapped under the dough.  Once the dough is flat to the tin, gently press the dough on the rim of the pan, then run a paring knife around the pan, cutting off the excess dough.  Then either using your fingers or a fork, crimp the edge of the crust, sealing it gently to the tin.  I actually had enough dough left over from this recipe to make a cherry tart as well, which was a hit with the kiddos. 

Trimming the Edge Off a Pie Crust

Once the crust is finished, pour in the sweet potato mixture, smoothing out the surface with a rubber spatula.  Pop it into the pre-heated oven until the crust is brown and flaky - about 1 hour.

Uncooked Sweet Potato Pie - Heading Into the Oven

Let the pie cool completely before serving as the filling needs to settle a bit before it is cut.  The pie was a hit with the in-laws.  Kim mentioned that it had the texture of pumpkin pie, but was lighter.  She really didn't taste the sweet potatoes at all, just sweet, with a heavy vanilla flavor.  My mother-in-law said it reminded her of the flavor of vanilla ice cream.  Personally for me, the vanilla flavor and overall sweetness were a little too much.  I would have like to have more of the sweet potato flavor.  The crust was good, but could have been baked a bit more.  I baked the pie for an hour and it could have probably stayed in for another five minutes or so.  When making this again, I would cut the sugar a bit and cut the vanilla as well, probably by 1/2.  Perhaps scraping a 1/2 vanilla pod into the evaporated milk instead of the vanilla extract would give the pie a more muted vanilla flavor, an undertone rather than the predominant taste.  Still, with a good cup of coffee, it was tasty.

Sweet Potato Pie - Schuler Version
Sweet Potato Pie - Saveur Version
Credit: Todd Coleman

Another recipe done - another that I would try again, with modifications.  Out of the 11 recipes that I have made thus far, there is only one that I would probably say I wouldn't make again (Joe's Special).  I wonder if that speaks to the "classic" nature of the recipes (Saveur did call the list the "101 Classic Recipes") or wide range of tastes.  Looking through the rest of the list, there are plenty of things that I have never eaten before and I'm not going to lie, intimidate me a bit, especially the Asian cuisine.  I guess that's part of the adventure and it wouldn't be a challenge if it wasn't easy.

11 down, 90 to go!

Sunday, October 14, 2012

Elvis Presley's Pound Cake

This blog post for certain has to be dedicated to my family.  My stepfather and sister are huge Elvis Presley fans.  They may not be the biggest fans in the world, but they are most certainly the biggest ones that I know.  I am a casual fan of his music, and was forced to watch his movies at a young age (there is only so much Blue Hawaii that someone can take), but I can safely say that I am more of a fan of his taste in food than I am anything else.  There are a bunch of "Elvis" Cookbooks including "Are You Hungry Tonight?" and "All Cooked Up: Recipes and Memories from Elvis' Friends and Family" and I'm sure they include recipes like "Hunka Hunka Burning Chili" and "Ain't Nothin' but a Hot Dogs", but supposedly one of his favorite sweet treats was this Pound Cake recipe from his child hood friend Janelle McComb.

The recipe itself (as found in the October '12 Saveur Magazine - click here for the recipe on Saveur.com) is simple (7 ingredients - unsalted butter, cake flour, sugar, vanilla, kosher salt, eggs and heavy cream) and even I had no issues producing a two fantastic pound cake loaves.  That may sound a little self deprecating, but I have issues baking.  I'll expound on that in a future post.

Elvis Presley Pound Cake Ingredients

I gathered the ingredients - letting the eggs, butter and cream come up to room temperature (having learned my lesson from my Spaghetti Carbonara experience) on the counter.  I greased two loaf pans with unsalted butter and sprinkled them with cake flour, setting them aside for later.

Loaf Pans - Buttered and Floured

Another best practice that I'm trying to adopt from other experiences in the 101 Recipe Challenge is to use the exact ingredients listed on the recipe.  In my initial recipe, Kibbeh, I used regular grind bulgur instead of fine grind and it affected the final dish.  The Elvis Presley Pound Cake recipe called for cake flour which I had never heard of.  I figured that it was to flour what confectioner's sugar was to table sugar.  Come to find out,  that couldn't be farther from the truth.  Cake Flour is a low protein flour, usually around 8%, made from a softer winter wheat.  Because of its low protein composition, when it is used in a recipe, less gluten forms in the dough or batter, creating a smooth texture with a finer crumb than recipes using all purpose flour.

After prepping the pans and starting up the oven (350 degrees...of course) I pulled out another of my beloved kitchen tools, my Kitchenmaid Stand Mixer.  To quote Ferris Beuller "So Choice.  If you have the means, I highly recommend that you pick one up."  Honestly, I love that thing and don't use it nearly as much as I should.  I put the softened butter, sugar and salt in the bowl and beat at 1/2 speed for six minutes, until the mixture was pale and fluffy.  I then added the eggs one at a time, beating well and scraping down the sides of the bowl between each. 

Batter in Mixer - beating in eggs individually.

I then added the flour and cream, alternating between the flour and cream, making sure to begin and end with the flour as the recipe called for.  I believe I added a cup of flour and 1/2 a cup of the cream at a time.  I then followed the direction to increase the speed to high and beat until light and fluffy, about 5 minutes.

The batter was unbelievably light and fluffy.  Between beating each egg into the batter individually, then beating it for a full 5 minutes on high with heavy cream in the batter, it had become the consistency of slightly loose whipped cream.  The taste was heavenly, almost like a vanilla mousse and it melted on my tongue.  If the final product was half as good as the batter, I was in for a treat.  As it was my family fell all over themselves to be the first to get a lick off of the rubber spatula and whisk attachment for the mixer.

Sifting Flour into the Batter

You may ask...why the sieve?  The recipe called for the cake flour to be sifted and I do not have a sifter (uni-tasker), so I used my hand sieve to sift the flour when adding it to the batter.  Then I divided the batter between the two loaf pans and smoothed the tops with a rubber spatula. 

Pound Cake, Ready for the Oven

The loaf pans went into the oven for about an hour and 15 minutes, until a toothpick was inserted and came out with a little crumb sticking to it.  The recipe called for letting the loaves cool, in pan, for 30 minutes, then cooling them completely until slicing.  Well, I can assure you that that did not happen.  They sat in pan for 30 minutes and cooled for about 5 after I took them out of the pan, but that was all I could take.  I cut a few slices and though the smell had been great in the kitchen while it had been baking, the smell was 100x better after it was sliced.  A thick, sweet smell with traces of vanilla and warm butter that made me a happy man.
 
Post Oven Pound Cake - Yummo!
Elvis Presley's Pound Cake - Schuler Version


Elvis Presley's Pound Cake - Saveur Example Photo

 The cake was very dense, but not heavy, with a very fine crumb.  The texture was very smooth and even the crust seemed to melt in my mouth.  To be sure, the cake was sweet, but not overpoweringly so.  You taste the vanilla almost as an undertone, but it is distinct.  I will make this recipe again, but using a higher quality vanilla as opposed to the private label Aldi's version.  I think the flavor profile would change and you would get a much more complex flavor from a better vanilla. Sometimes when you have pound cake, you need to have some sort of accompaniment (fruit, ice cream, rum, etc) because the cake itself isn't remarkable.  My friends, this pound cake has entered my system unadulterated every time that I've eaten it.  It is so tasty that anything with it, I believe, would be distracting.

You really need to make this recipe...really.

I will be making this recipe again....and again and again.  I think that it might actually become my go to dessert, or possibly SPOILER ALERT FOR MY FAMILY AND FRIENDS the bulk "Christmas Gift" that I make for everyone this year.  But don't call me cheap until you try it.

4 down, 97 to go!

Wednesday, October 3, 2012

Peanut Butter Cookies

As I continue to catalog the ingredients for my 101 recipe challenge (see original post), which is taking much, much longer than I originally thought it would, I am trying to continue to make recipes to keep myself on a pace of at least 2 a week to make my deadline of August 3rd.  I will have to make 3 dishes during some weeks, but until I get ahead of myself in preparation, 2 should keep my head above water.

I had originally planned, and purchased ingredients for, Senate Bean Soup but life has gotten in the way a bit and I haven't had the time needed to prepare and enjoy the soup.  Sure, I could have made it at 10:30 at night, but that's not the best time to have dinner.  I had planned to make it over the weekend, but instead I had the opportunity to make a dessert for a football party at a friends house (Go Pack Go).  I chose to make recipe 84 - Peanut Butter Cookies.

This recipe for peanut butter cookies was pretty standard (flour, baking powder, salt, sugar, brown sugar, butter, eggs, peanut butter, vanilla) and it took me about an hour and a half to make a batch.

Peanut Butter Cookie Ingredients

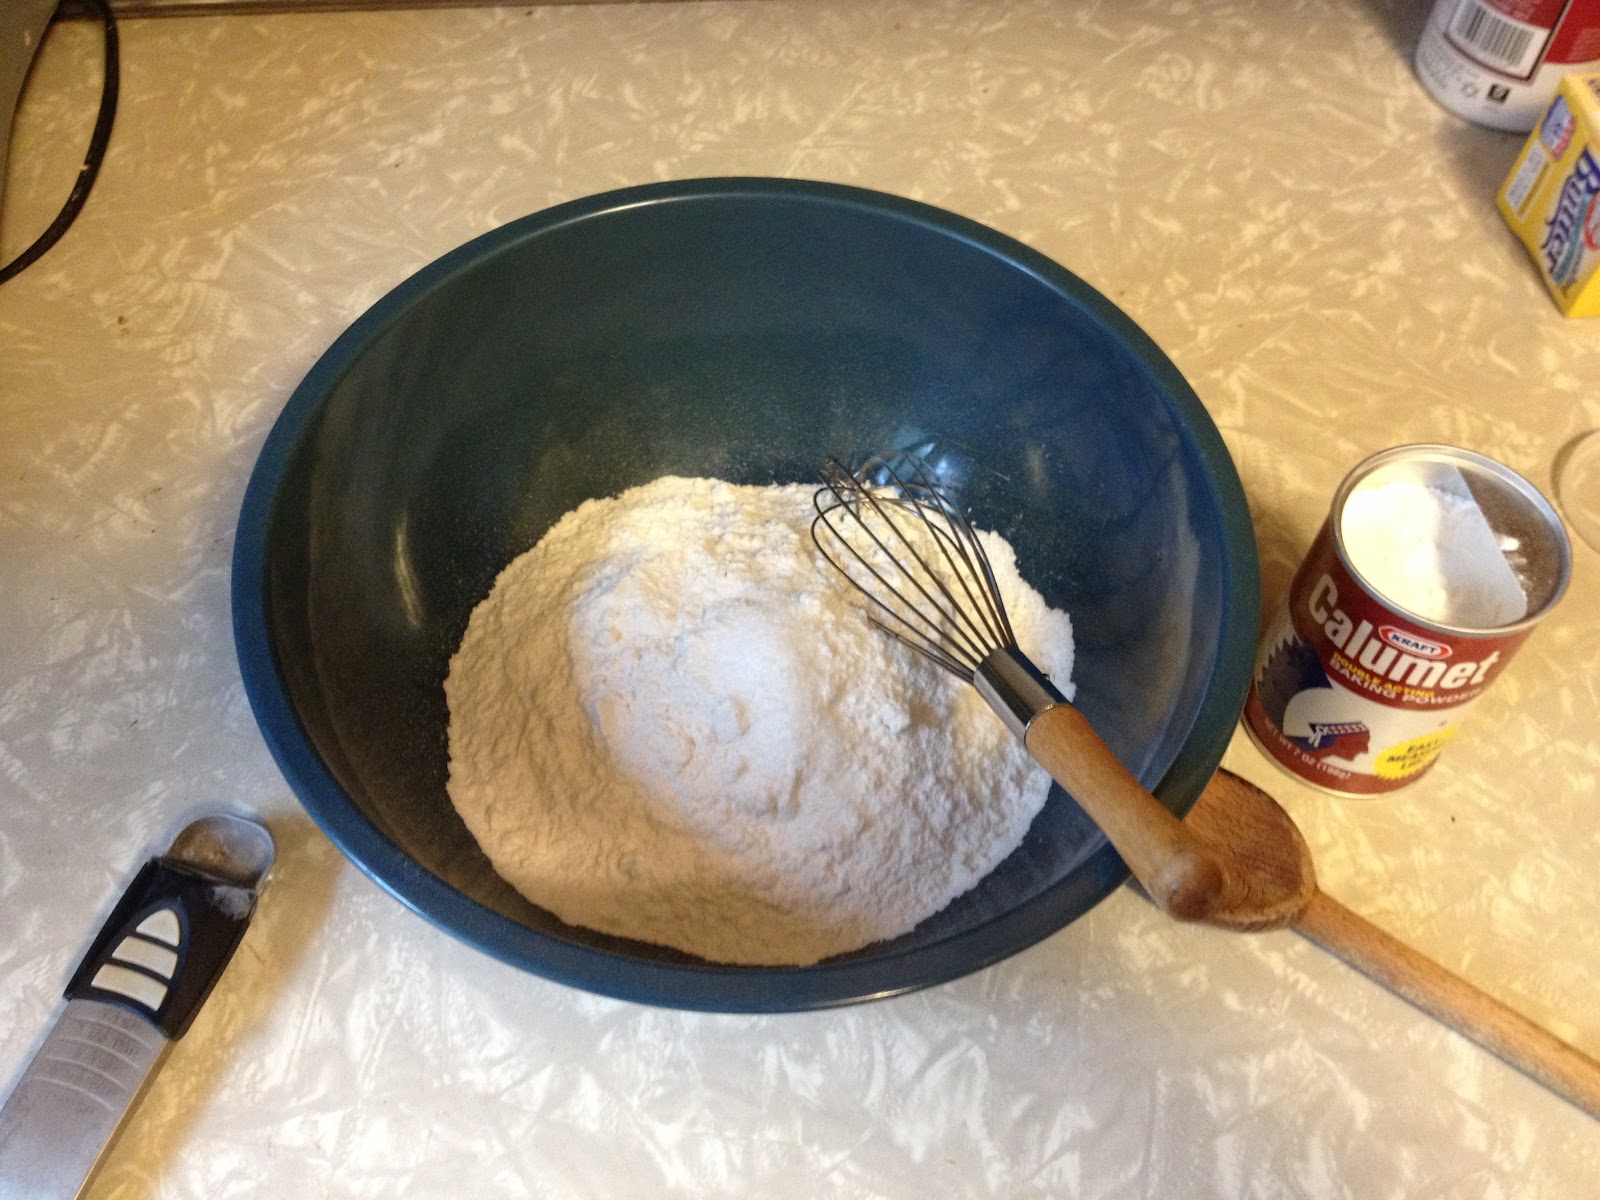
The recipe first calls for whisking together the flour, baking powder and salt and setting aside.

Flour, Baking Powder and Salt - Whisked

Next, using an electric beater, I combined the sugars and butter, beating until fluffy (about 3 minutes).  First - 3 minutes seemed like an awful long time, and second, I'm not sure if I would have classified the result I got as "fluffy".  Mine ended up more like the consistency of wet sand.  Honestly, I probably could have made mud pies out of it.  Delicious, buttery mud pies, but mud pies none the less.

Getting ready to cream the sugar


 I then added the eggs, one at a time, beating thoroughly adding each.  Then the peanut butter and vanilla, beating until they were combined.

Cookie dough, re, mi

Taking a tablespoon, I took the dough and made dough balls that ended up being about 1 1/2" in diameter.  I placed them on the cookie sheet with 2" separating the dough balls and pressed them with a fork making a criss cross pattern.


Criss Crossing Some Cookies

Off they then went into my semi-faithful oven, preheated to 350 degrees for 12 minutes, with a rotation of the tray halfway through the cook time.  The recipe called for parchment paper, which I did not have, so I cut the bake time by a minute to make sure they didn't get too browned on the bottom.

As the cookies came out of the oven, I couldn't keep them in the kitchen.  As soon as they were even close to cool, my wife and kids started to grab one whenever they walked though and I'm sure that they made a few extra trips.  The cookies were nice and chewy, with a peanut butter flavor that was satisfying, but not overpowering.  The cookies had a little bit of buttery flake on the edges, a little like a pie crust.  The recipe I usually make calls for a dusting of granulated sugar on the dough balls prior to pressing with a fork, so these cookies were slightly less sweet than I would have liked.  Kim (my wife) rated them 7.5 out of 10.  A Hershey's kiss planted in the center of the cookie would have probably landed me a 10 (her all time favorite Christmas cookie is the Peanut Butter kiss).

Peanut Butter Cookies - Schuler Version
My Peanut Butter Cookies
Peanut Butter Cookies - Saveur Version
Saveur Peanut Butter Cookies
The only issue that I really had with the cookies was in the days after I made the cookies.  They dried out a bit and became really crispy - almost like shortbread cookies.  They didn't taste any worse, but I am more of a fan of chewy cookies than crisp cookies.  It may have been due to not having the parchment paper, or possibly just how these cookies "age".  Maybe they don't usually last that long.

Another idea for these would have been to make a Peanut Butter Cookie Sandwich by slathering on some strawberry preserves and finishing up with a second cookie.  Mmm...will have to try that next time.

I'd love to get your favorite Peanut Butter Cookie trait, story or obsession.  Feel free to post!

I've picked a few recipes and ingredients for the next week - in no particular order: Chicken with 40 Cloves of Garlic, Senate Bean Soup, Egg Cream Soda, Spaghetti Carbonara and Elvis Presley's Pound Cake.

I will also post some interim items based on the fun things I find during the cataloging process (like the inordinate amount of eggs and onions I will be using) and the planning process.

Two down, ninety-nine to go!