Showing posts with label food pictures. Show all posts

Wednesday, December 12, 2012

Cream of Tomato Soup


Growing up in a single parent household with two hungry siblings, we relied heavily on simple, quick meals to get us through the week when mom had to work late.  That meant quite a few casseroles (Penny Casserole, Chicken a la king), baked Italian pastas (it took me a few years of not living at home until I could eat a stuffed shell again) and of course - Grilled Cheese with Cream of Tomato Soup.

When I hear "Cream of Tomato Soup",  like millions of Americans, I think of the salty, savory flavor of Campbell's Condensed Cream of Tomato Soup.  Tasty for sure, but one dimensional.  But, if Campbell's is 1D, the version of the soup in Saveur's 101 Classic Recipes produces a soup that is full on 3-D.

Cream of Tomato Soup Ingredients

 The ingredients are:

4 slices thick-cut bacon, finely chopped
2 tbsp unsalted butter
4 cloves garlic, finely chopped
1 medium carrot, finely chopped
3 tbsp tomato paste
1 tbsp flour
4 cups chicken stock
2 sprigs thyme
1 bay leaf
1 15-oz can whole, peeled, crushed by hand
1/4 cup heavy cream
Kosher salt and ground pepper, to taste
Creme fraiche, croutons and finely chopped chives, to garnish

Many of the recipes in that I have been cooking call for the use of a 4-quart saucepan, but in my experience the more room your food has to cook, the better the final results.  The bottom of my pot is a bit thinner than my saucepan, so I have to keep a closer eye on the flame that I cook with to make sure the food doesn't burn or heat more quickly than I'd like, but that tends to be the only difference for me.  Plus the wooden spoon makes a satisfying clang when I bang the remnants off of it by hitting the side of the stock pot.  When I hit the spoon on the side of the saucepan the sound it makes is more of a "plink".

I placed my stock pot on medium heat and heated the bacon until all the fat had rendered out and the bacon had crisped nicely. 

Bacon makes everything better.

I then added the butter, cranked the heat up a bit and added the onion, garlic and carrot, stirring until it had softened and the onions had become translucent, about 10 minutes.  I was surprised that there was no celery in the recipe, leaving the traditional soup/sauce base mirepoix incomplete.  That would be an interesting addition when I make the recipe again.

Sauteeing onions, carrots and garlic.

I tossed in the tomato paste and cooked until caramelized a bit, then added the flour and cooked while stirring constantly (about 5 minutes total).


 Next - the big dump.  Into the pot went the stock, thyme, bay leaf and tomatoes and once they had boiled, I reduced the heat to low and simmered the soup until it had reduced a bit, about 30 minutes, stirring occasionally.

Simmering Cream of Tomato Soup - pre-puree.

Once the soup had finished cooking I removed it from the stove and engaged my trusty immersion blender to puree the heck out of it.  After pureeing the soup, I stirred in the cream and seasoned lightly with salt, but liberally with pepper.

For garnish the recipe calls for creme fraiche, croutons and diced chives which posed some problems. Trying to stay as low carb as possible, croutons were out,  I checked a few local groceries and couldn't find creme fraiche, so I tried to make it at home using a recipe I found online (two cups buttermilk mixed with one tablespoon of lemon juice, left on the counter, covered, overnight), but it was unsuccessful.  Instead, to plate (do you "plate" soup?  Maybe you "bowl" it?) the soup I  used sour cream mixed with a little milk and chopped chives.

Cream of Tomato Soup - Schuler Version

I made the soup for a group of friends (as all great cooking should be) and there wasn't a lick left in each bowl when they finished.  In comparison to the salty, almost tinny taste of the Campbell's Tomato soup, this was fresh tasting with a smoky undertone from the bacon.  I am a big fan of sour cream in all forms and one of my favorite moments in eating this was when I would put a spoonful in my mouth and the hot, savory soup would first coat my tongue, only to be extinguished by the creamy, tart taste of the sour cream.  Kind of like the mouth feel of cool blue cheese on a chicken wing.  Yum.

I'll probably make this again, but to me the experience of making this soup is a little less about this final product as it is about learning the basic structure of the recipe and playing with the parts - Cream of  Potato, Cream of Asparagus, Cream of Parsnip, Cream of  Broccoli, etc, etc.  I'm a big fan of the skill of "Kitchen Cupboard" Cooking.  That is, the ability to look into the kitchen cupboard, fridge and pantry and making a great meal out of whatever is in there.  Culinary problem solving at its finest.

Cream of Tomato Soup - Saveur Version
Credit: Todd Coleman

16 down, 85 to go!

Monday, December 10, 2012

Chocolate Chip Cookies


When the holidays are approaching, I always get the urge to bake copious amounts of cookies.  Cut-outs, jam thumbprints, pecan sandies, snickerdoodles and especially my infamous pumpkin cookies with cream cheese frosting.  I figured I would feed the urge and knock another of the 101 Classic Recipes off the list and kill two birds with one stone and make recipe 80 - Chocolate Chip Cookies.  The recipe includes the ingredients listed in the classic Toll House Cookie recipe.  A bit of an aside - if you have ever wondered why they are called Toll House Cookies - it's because the recipe is from the Toll House Restaurant in Massachusetts, where Ruth Wakefield first made them in the 1930's (find more information here). 

Chocolate Chip Cookie Ingredients

The ingredients are:

2 1/4 cups flour
3/4 tsp baking soda
3/4 tsp kosher salt
16 tbsp unsalted butter
3/4 cup packed dark brown sugar
3/4 cup sugar
1 tsp vanilla extract
4 egg yolks (save the whites for breakfast)
9 oz bittersweet chocolate, roughly chopped

Full disclosure - this is the first recipe that I completely screwed up and had to make again.  I can blame it on bad lighting or smudges on my glasses, but I misread the recipe and used 1/4 cup of both dark brown sugar and sugar, rather than the 3/4 cup that the recipe calls for.  I even noted to my wife, "I can't believe these cookies use so little sugar."  The cookies that resulted were super dry, almost powdery when you bit into them. More like dog biscuits than cookies.  When I re-read the recipe and tried again. All photos are from attempt #2.

Preheat the oven to 375 degrees and whisk together the flour, soda, and salt in a bowl and set aside.  Combine the sugars, vanilla and butter in a mixer and beat until fluffy and smooth (and mighty tasty...I can't help but munch on the dough at each phase in the recipe, it just smells so good!).  creaming the butter/sugar should take about 3 minutes.

God Save the Kitchen-Aid Mixer

Then add the yolks, two at a time, beating completely between each set.  Add dry ingredients and mix until combined.

Chocolate Chip Cookie Dough - in development

Transfer the dough to a floured work surface and divide into 3 pieces and flatten into a 4 x 6" rectangle, wrap in plastic wrap and chill for 30 minutes.  I don't usually keep a ruler in the kitchen, so the pieces may have been different sizes, but I'm more of a "eyeball it" kind of guy anyhow.

Dough segments, wrapped, pre-chill

With the dough in the fridge, I set to chopping some chocolate.  I'm a big fan of labor saving devices.  You saw the Kitchen-Aid mixer (my second love, next to my wife) and I'm also a fan of the microwave, slicers and my food processor.  I realize that I have an unhealthy connection to my kitchen tools and utensils, just ask me about my wooden spoon, cleaver and dough blade.

I chopped the 9 oz bar of chocolate into thinner bars and tried to chop it in the food processor using the chopping blade and the results were less than astounding.  Because of the hardness of the chocolate and the fact that the pieces bounced around the processor bowl, all I got was big hunks of powdery chocolate.  I dumped it out onto the chopping block and went at it with the knife.

Chocolate....yum!
Chopped Chocolate

After the dough had thoroughly chilled, I placed one layer of dough on the floured counter and covered with half the chocolate.  I then laid the second layer of dough on that, followed by the remainder of the chocolate.

Layer of Dough with Chocolate

Finally I placed the final layer of dough on top of the pile.

Layered Chocolate Chip Cookie Dough and Chocolate

Using a floured rolling pin, I rolled the pile out to the recommended 9" x 6" x 1 1/2" rectangle and using a 2-inch round cut out the cookies and placed them on a parchment paper lined cookie sheet, spaced 3" apart.

Dough being cut with a 2-inch round

After munching on some of the smaller scraps, I bunched the survivors...I mean remainders, and rolled them out to 1 1/2" thick, cut out cookies and placed them on the sheet.

Chocolate Chip Cookies, pre-baked on parchment paper

I baked them for about 15 minutes, rotating the pans halfway through the cook-time, and they came out golden brown.

It's tough to screw up chocolate chip cookies...says the man that screwed up this recipe once, but these were pretty good.  Hand chopping the chocolate caused there to be chocolate morsels of varying sizes in the cookies and because of the way the cookies were layered, there was chocolate in every single bite.  Some bites you would get a swirl of chocolate, possibly from the smaller, powdery chocolate.  Other bites you would get a fantastic, gooey pocket of sweet goodness.

They were good, but I'm not sure if they were worth the extra work of chilling the dough, layering it and rolling it out.  I could have been eating cookies 30 minutes sooner if I'd just dropped tablespoons of dough on the sheets (and they would have been a bit chewier too).  I believe that the chopped chocolate would still have the same wonderful effect on the cookies.

As for the response of my wife and kids, they didn't need to tell me that they liked them.  The fact that cookies kept disappearing off the cooling racks was comment enough.

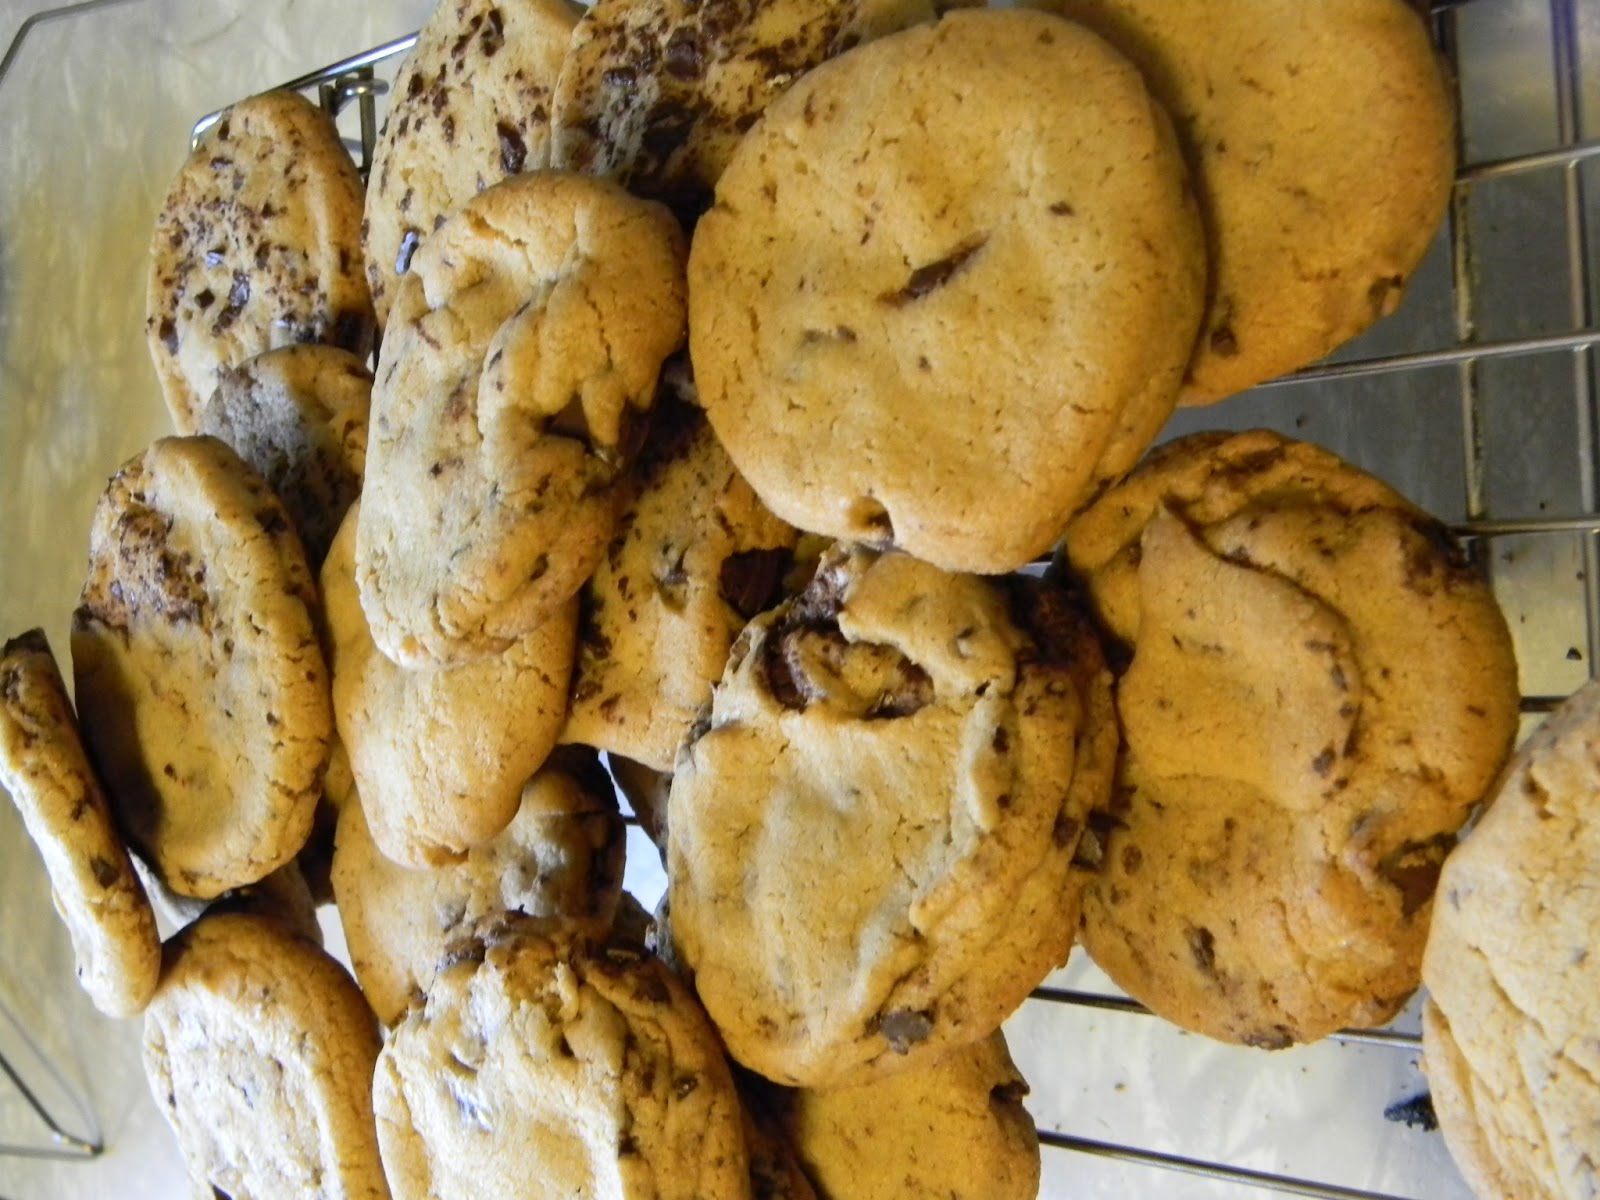
Chocolate Chip Cookies, final product
Chocolate Chip Cookies - Schuler  Version  
Chocolate Chip Cookies - Saveur version
Credit: Todd Coleman

Over the next few posts I will be writing about making a bunch of recipes, but this will be my last dessert until I make Croquembouche for our Christmas party.  I'll also be making a few of the past recipes I've blogged about (Ful Medames and Gougeres for sure).

Thanks for reading this post - hopefully you enjoy the cookies as much as my family did!

15 down, 86 to go!


Sunday, November 18, 2012

Djaj Mqualli

Djaj Mqualli Ingredients

The next meal in my quest to prepare all 101 Classic Recipes in Saveur Magazines 150th issue is one that may not only be the most adventurous so far, but the hardest to pronounce as well.  Djaj Mqualli is a tangine of chicken, preserved lemons and olives from Morocco and includes a host of ingredients with very distinct flavors including ginger, saffron and coriander.

Djaj Mqualli Ingredients:

3 tbsp. olive oil
5 whole chicken legs
Kosher salt and freshly ground black pepper, to taste
2 large yellow onions, sliced
2 tbsp. ground coriander
2 tsp. ground white pepper
2 tsp. ground ginger
1 tsp. ground turmeric
1/2 tsp. crushed saffron threads
1 1/2 cups chicken stock
6 oz. green olives, cracked
2 tbsp. unsalted butter
1 tbsp. finely chopped parsley
2 tsp. finely chopped cilantro
2 jarred preserved lemons, cut into slices

The first step in preparing Djaj Mqualli is to heat the olive oil over medium high heat in a dutch oven and
brown the chicken legs, turning once, for a total time of about 12-15 minutes.  As with grilling, I always cook meats with the skin or "presentation" side down first.  This way you get a good, quality color/sear on the part of the meat that will be visible.  Letting the skin brown fully until it has caramelized and released from the pan also helps keep the chicken in whole pieces, rather than leaving chunks of skin and meat stuck to the bottom of the pan.


Chicken Legs in Dutch Oven

As I noted in the my previous post for Chicken with Forty Cloves of Garlic, I often have the habit of not browning meats enough in the beginning of a recipe and get lackluster results in the final product.  For this dish I browned the meat beyond the point that I normally would, hoping that the final product would have more color and flavor.


Browned Chicken Legs

Once the chicken legs had been fully browned, I set them aside on a plate and placed the chopped onion into the dutch oven and sauteed them until they were soft and golden.


Sauteeing Onions and Spicest

Once the onions had been cooked, I added the combination of spices and stirred them to fully integrate them into the onion mix and cooked for an additional two minutes.

One of the spices that Djaj Mqualli contains is saffron, the stigma of the saffron crocus flower and is extremely expensive.  From www.Penzeys.com:  "Saffron is so valuable because it is a very labor intensive crop, and only 5-7 pounds of saffron can be produced from each acre of land.  This makes saffron the most expensive spice by weight - it always has been- but by use, saffron isn't that expensive because a little goes a long way."  Saffron is available in most area supermarkets, but it is pricey.  The photo below is the package of saffron that I purchased from Budwey's for $7.99.  It looks pretty good right? A big bowl of saffron, almost a little like orange-red spaghetti.  However...


Big Bowl of Saffron?


pictured below is the same container, with my wedding ring (size 13) for comparison purposes.  The saffron pictured is approximately a gram of saffron, but enough for at least 10 recipes.
 
Saffron Next to my Wedding Ring

Once the spice mixture had been fully incorporated into the onion mixture I put the chicken legs back in, spooned the onion mixture on top of them and baked them in a 350 degree oven, covered for 40 minutes.  


Tangine Heading into the Oven

After the allotted time, I stirred in the olives, butter, parsley, cilantro and preserved lemons into the pot and returned to the oven for another 5 or 6 minutes.   


It's suggested that the Djaj be served with rice or flatbread and I opted for rice (but wished I had some flatbread).  There are a lot of strong flavors in this dish that could fight to over power each other (green olives, saffron, cilantro, onions, preserved lemons), but the slow roast of the onions certainly mellowed their flavor and the cilantro, green olives and lemons seemed to play well off of each other.  The lemons are preserved in brine and deliver not only sourness, but a salinity that kept up with the olives.  The sour flavor of the olives and lemon, was complimented, but not covered, by the distinct savory flavor of the cilantro.  Kim (everyone pretty much knows she's my wife at this point...right?) is not usually a huge fan of chicken legs and thighs, cumin, coriander, cilantro or green olives, but because the chicken was so tender, basically falling off the bone and because the other flavors of the meal were so bold that they covered up the offensive ingredients, she didn't notice them in the meal and she enjoyed it.


Djaj Mqualli - Schuler Version

Djaj Mqualli - Saveur Version
Credit: Todd Coleman

While I would have given Djaj Mqualli a 7 or 8 out of 10 on the night that I made it, it was so much better when I had the leftovers for dinner the next day.  The flavors had melded and mellowed even more and the chicken was so buttery that I had to stop short of gnawing on my fingers as I ate it.

One final warning though about saffron. Saffron tends to vibrantly color everything that it comes in contact with, like my cutting board, my counter and even one of my dishes.  While eating this, if you go native and eat with your fingers, be prepared for yellow finger tips and possibly even lips, but oh, it is so worth it!

Lucky # 13 down, 88 to go.


Sunday, November 11, 2012

Sweet Potato Pie

Sweet Potato Pie Ingredients

In my last post for Joe's Special, I griped about how it was hard to be on a low carb diet and try to make as many of the 101 recipes as possible.  When I wrote that post, little did I know that I was standing on the bring of the sugary abyss known as Halloween.  Halloween came and went, and with it almost all of what willpower I had.  For the past week and a half I have fallen off the wagon and as usual, when I fall off, I fall off hard.  I've gone from virtually no sweets and starches to enough to choke a rhino.  From the kids' Halloween Candy to breakfast cereal to rolls with meals and of course desserts.  Since I  had caved to my inner urges already and my in-laws were in town, I decided to make a special meal of Chicken Stroganoff (a modified version of  the Saveur Beef Stroganoff recipe, using chicken and noodles instead of beef and matchstick potatoes) and Sweet Potato Pie

I'm not usually a big fan of pie, so it is not a big surprise that I had never had Sweet Potato Pie, but with the exception of throwing a Rich's pre-made frozen pie into the oven at my first cooking job (Don's Groceries in Royalton Center) I had never made any kind of pie.  This recipe was fairly simple and, spoiler, tasted fantastic.

Sweet Potato Pie Ingredients:

 1 3/4 cups flour
8 tbsp. unsalted butter, cubed and chilled, plus 8 tbsp. melted and cooled
1 tsp. Kosher salt
2 cups boiled and mashed sweet potatoes
1 cup sugar
1/2 cup evaporated milk
1 tsp vanilla extract
2 eggs, lightly beaten

In the entry for this recipe, Jane and Michael Stern, SAVEUR contributing editors note that this recipe comes from Mrs. Bonner, a cafe owner in Crawfordville, Georgia.  The secret to the bright color of the pie is that the sweet potatoes are boiled rather than baked, leaving them bright orange. 

Though I haven't made Sweet Potato Pie, I have made plenty of sweet potatoes.  Mashed sweet potatoes were a favorite of the kids when they were younger and still a staple at the holiday table.  When making sweet potatoes, many people peel, then cube and boil them, but I find it much easier to boil them whole first, cool them a bit and then peel them.  I put six medium sweet potatoes in a stock pot and covered them with water over high heat.  Once boiling, I lowered the heat to medium and let cook for 30 minutes.

Sweet Potatoes - Pre-boil

While the potatoes bubbled away on the stove top, I placed the flour, cubed butter and a 1/2 tsp. of salt in my food processor and pulsed until pea sized crumbles formed, then added 1/2 cup of ice cold water and pulsed a few more times until a dough formed.

Pea Sized Dough Crumbles
I scooped the dough out of the food processor (first unplugging it from the outlet and removing the chopping blade - I like all 10 of my fingers) and formed a nice softball sized ball of dough.  I placed the ball on a floured surface and formed a dough disc that I wrapped in plastic wrap and popped into the refrigerator for a half hour to chill.

Pie Dough Disc

With the dough in the fridge, I microwaved the remaining butter until it had melted.  I've found that when I melting butter for baking that if I melt on high heat it gets too hot and takes quite a long time to cool.  I usually put it in the microwave for 45 seconds at 50% power, which gets the butter just about melted and the residual heat (with the help of a quick stir) melts it completely.  That way it is at a lower temperature and fully cools in less time.

A short time later the potatoes had finished cooking and I quickly placed them in an ice water bath to stop the cooking process.  Once cooled, all that is needed is a quick, shallow slice down the middle of the potato and the skins pop right off when you apply a little pressure with your fingers.  I made about 3x the amount of potatoes needed for this recipe, figuring that I could use them for dinner the next night, saving me prep time.

Boiled Sweet Potatoes Peel Easily
  I gave the potatoes a thorough mashing (nothing is worse than potato chunks in your mash - whether it be white or sweet potatoes) and hand whisked in the melted butter, eggs, evaporated milk, sugar and vanilla, continuing to mix until it was nice and smooth.

Sweet Potato Pie Filling Ingredients

The timing was perfect as 30 minutes had elapsed since I had put the dough in the fridge.  I started pre-heating the oven at 375 degrees, took the dough out and quickly rolled it out on my floured counter top.  If you want a flaky crust it is important to handle the dough as little as possible and to keep it as cold as possible.  By doing this you limit the amount of gluten that is produced in the process (the protein that makes bread so wonderfully chewy, but not very helpful in creating a flaky pie crust).

Rolling, Rolling, Rolling

It is not vital that you roll the dough out to a perfect circle.  I tried to figure out what the outline of my dough looked like and came up with either the Millennium Falcon or a Rorschach Test.  It is important thought to make sure that you roll it out until it is an 1/8 of an inch thick and that you place your pie tin upside down on the dough to make sure you have about 2 inches extra dough around the tin.  It's discouraging to have to start rolling it out again if you find that you haven't rolled it out enough.

Millenium Falcon?

Once rolled out, fold the dough in half, gently, then pull on top of the pie tin and unfold.  Lightly press the dough into the tin, making sure to push out the air that might be trapped under the dough.  Once the dough is flat to the tin, gently press the dough on the rim of the pan, then run a paring knife around the pan, cutting off the excess dough.  Then either using your fingers or a fork, crimp the edge of the crust, sealing it gently to the tin.  I actually had enough dough left over from this recipe to make a cherry tart as well, which was a hit with the kiddos. 

Trimming the Edge Off a Pie Crust

Once the crust is finished, pour in the sweet potato mixture, smoothing out the surface with a rubber spatula.  Pop it into the pre-heated oven until the crust is brown and flaky - about 1 hour.

Uncooked Sweet Potato Pie - Heading Into the Oven

Let the pie cool completely before serving as the filling needs to settle a bit before it is cut.  The pie was a hit with the in-laws.  Kim mentioned that it had the texture of pumpkin pie, but was lighter.  She really didn't taste the sweet potatoes at all, just sweet, with a heavy vanilla flavor.  My mother-in-law said it reminded her of the flavor of vanilla ice cream.  Personally for me, the vanilla flavor and overall sweetness were a little too much.  I would have like to have more of the sweet potato flavor.  The crust was good, but could have been baked a bit more.  I baked the pie for an hour and it could have probably stayed in for another five minutes or so.  When making this again, I would cut the sugar a bit and cut the vanilla as well, probably by 1/2.  Perhaps scraping a 1/2 vanilla pod into the evaporated milk instead of the vanilla extract would give the pie a more muted vanilla flavor, an undertone rather than the predominant taste.  Still, with a good cup of coffee, it was tasty.

Sweet Potato Pie - Schuler Version
Sweet Potato Pie - Saveur Version
Credit: Todd Coleman

Another recipe done - another that I would try again, with modifications.  Out of the 11 recipes that I have made thus far, there is only one that I would probably say I wouldn't make again (Joe's Special).  I wonder if that speaks to the "classic" nature of the recipes (Saveur did call the list the "101 Classic Recipes") or wide range of tastes.  Looking through the rest of the list, there are plenty of things that I have never eaten before and I'm not going to lie, intimidate me a bit, especially the Asian cuisine.  I guess that's part of the adventure and it wouldn't be a challenge if it wasn't easy.

11 down, 90 to go!

Thursday, November 8, 2012

Joe's Special


Trying to maintain a semi-low carb diet while trying to make as many of the 101 Classic Recipes as possible has proven to be a challenge.  Any other time I would whole-heartedly embrace all of these recipes, so full of potatoes, hominy, flour, and pasta, but for the next few weeks I am trying to be good to make up for what I'm sure will be a calorie filled set of holidays.  That being said, one of the low carb recipes that can be found in the set of recipes is Joe's Special, listed in James Oseland's description as "one of the most odd and divine scrambles known to man".  According the the article, the dish originated in San Francisco Italian-American restaurant and has since moved into the dinner menu of a generation of home cooks in Northern California.  I decided to make it for the family as a quick Sunday dinner.

The ingredients for Joe's Special are:

2 tbsp. olive oil
5 cloves garlic, minced
1 medium yellow onion, finely chopped
8 oz. ground chuck
1 10-oz package frozen, chopped spinach, thawed and squeezed dry in paper towels
8 eggs, lightly beaten
Kosher salt and freshly ground pepper, to taste
1/4 cup finely grated Parmesan cheese
Crusty Italian bread, for serving

The recipe itself is pretty straightforward and if you can make scrambled eggs - you can make Joe's Special easily.


The first step is to Heat the oil in a skillet over medium-high heat and add the garlic and onion until soft,  between 5 and 7 minutes.  Add the chuck and stir until completely cooked through and all the moisture has evaporated, about 10 minutes.   


Stir in spinach and cook until heated through, 2 minutes.  Add eggs and cook until eggs are firm and mixture is slightly dry, between 4 and 5 minutes.


Season with salt and pepper, sprinkle with Parmesan cheese and serve with bread.

Credit: Todd Coleman
I must say that while the spinach in the previous recipe (Saag Paneer) existed in harmony with the other ingredients in making a terrific taste profile, the spinach in Joe's Special seemed to overpower the other ingredients.  I supposed if I had used baby spinach rather than the frozen/thawed spinach, the flavor would probably have been less intense.  With that said though, eating the egg mixture with bread actually made a big difference.  It seemed to temper the spinach flavor and bring out the natural creaminess of the eggs and cheese.

I'm sorry to say that this is a recipe that I probably will not make again - unless I find myself with a handful of ground beef, spinach and a few eggs lying around.

10 recipes down, 91 to go.

Sunday, November 4, 2012

Saag Paneer

Ingredients for Saag Paneer

One of the reasons that I wanted to start this blog/challenge was to break myself out of the culinary rut that I have been in for the past few months and as well, expand the palate of both myself and my wife.  We don't tend to be as adventurous as I'd like to be and I felt that the set of 101 Classic Recipes listed in the 150th issue of Saveur Magazine might just be the ticket. With that, I knew that there were would be many ingredients, a few techniques and a few styles of cuisine that I had never used, attempted or tried.

My next dish, Saag Paneer (Spinach with Fresh Indian Cheese) would take care of two of those at one time.  While I have made many things in my life, but cheese is not one of them.  I have also never tried Indian food - neither cooking it nor eating it.  I was very eager to take a crack at it.

Ingredients for Saag Paneer:

For the cheese:
8 cups milk
1/4 cup fresh lemon juice
6 tbsp. ghee or canola oil

For the spinach:
4 cloves of garlic, chopped
1 1" piece ginger, peeled and chopped
1 serrano chili, stemmed and chopped
6 cups finely chopped spinach
Kosher salt, to taste
6 tbsp. heavy cream
1/2 tsp garam masala
1/2 tsp cayenne
Indian flatbread or rice, for serving

A quick apology, when I made this dish I had a guest in the kitchen and found myself chatting as much as cooking (which usually is my favorite way to cook :-)) and I completely forgot to take pictures at steps I normally would have.

First I set the milk in a large sauce pot on medium high heat until just under a boil, keeping in mind to stir often with a wooden spoon so that it didn't scorch.  While a good burnt flavor is desirable in some things (hamburger, steak, creme brulee), it renders other things like popcorn, garlic and in this case, milk, completely inedible in my opinion.  While the milk was heating (and in between stirs) I set up a colander in the sink with four layers of cheesecloth on it, edges hanging over the sides.

Once the milk started its lovely pre-boil undulations, I lowered the heat and added the lemon juice to the pot and stirred slowly for thirty seconds while the milk curdled.  Once the curds and whey had separated, I poured them into the colander, catching the curd in the cheese cloth.  I rinsed the curd in order to remove any lingering lemon juice and tied the corners of the cheesecloth together, gently squeezing out the liquid.  I then inserted a wooden spoon and let the cheese drain over the large pot for an hour and a half.

Leaving my cheese hanging.

After the hang time, I untied the cheesecloth and overlapped the edges and set it on a plate and set a heavy weight (see cast iron skillet) on it for another 45 minutes. 


Cast Iron Skillet - Kitchen Mulit-tasker.

Below is the cheese that was produced from the squeezing and pressing.  In retrospect, while the texture of the fresh cheese is rather addicting, the flavor left a whole lot to be desired.  When I try my hand at this again I will better squeeze the curd when in the initial compression stage (mine ended up a bit loose as you can see in the photo) and I will salt liberally with sea salt.

Post Press Cheese

The cheese was then cut into 1/2" x 1" cubes which, as previously mentioned, were a bit loose and fell apart easily.

Cheese ready for the pan.

I poured the canola oil into a non-stick pan over medium heat and fried the cheese in batches.

In over 33 years of cooking experience, I have tried cooking many things, many ways, but I have always had an issue with pan frying.  I know that the issue in all likelihood is me, however I like to blame things like the pans I have used, the cook tops, even the spatulas.  The issue isn't that I routinely create a fiery train wreck of a meal every time I wield a pan.  Instead, I am cursed by the mediocre results. Oh, I can saute a mean onion or mushroom, but when it comes to getting that perfect, crusty, crunchy caramelization on food, I end up pulling up short or going to far and ending up with burnt bits.  The browning of the chicken for another of the recipes included in this blog, Chicken with Forty Cloves of Garlic, is a perfect example.

The paneer was no exception.  While I tried to let the cheese cubes sit long enough to caramelize and release from the pan, they still ended up sticking and making little bits of burnt cheese.  By making the cheese a bit firmer the next time round, I hope to rectify that problem.

Paneer getting its brown on.

As I said though, not a fiery train wreck, just less than optimal (still yummy).  Once the cheese had been browned all over, I transferred it to a plate for use later.

Garlic, Serrano Pepper and Ginger pre-blend and Fried Paneer

While the the cheese sizzled away, I placed the garlic, ginger, chili and 1/2 cup water and pureed.  The original recipe states that it should be pureed into a paste, but with that much water, it was not paste like at all.  Note to self, next time cut the water in 1/2.


Garlic, Serrano Pepper and Ginger - post blend.

  Once the cheese had finished, I returned the pan to medium heat, added the garlic concoction and cooked until "fragrant", about 30 seconds. 


I tossed the spinach into the pan, coating with the bubbling liquid and stirred the chopped leaves until they had wilted, then covered the pan and cooked, stirring often, until the spinach was soft about 15 minutes.  Though the original recipe does not instruct you to add water while the spinach cooks, I found that over the course of 15 minutes I added approximately a 1/3 cup of water to make sure the spinach 
didn't completely dry out and burn.

Chopped Spinach

After the spinach had softened, I stirred in the cream, garam masala, and cayenne, stirring to incorporate fully.  I added the previously cooked cheese to the skillet, covered and cooked until the liquid had thickened and the cheese had warmed through, about 15 minutes.  I was a bit afraid that the cheese might dissolve or at least begin to break apart, but it seemed to hold together well.  I also stirred gently while cooking in order to make sure I did not expedite the process prematurely.

I served the Saag Paneer with brown rice rather than traditional Indian flatbread, but I must say I was pleasantly surprised.  While the spinach flavor was evident, it was not overpowering. The garam masala (a combination of spices including cumin, coriander, cardmom, pepper, cinnamon, cloves and nutmeg) presented a spicy match to the earthy spinach and the cayenne delivered a heat that was a slow burn.  You didn't really get it on the first bite, but it built from the second, to the third and by the fourth or fifth, you were breaking a sweat.  The texture was creamy and smooth, with the slightly crunchy paneer providing a slight change in pace in each bite.  My constant companion and trusty taste tester,  Kim, was quite surprised with how much she enjoyed it.  She noted that while she wasn't a huge fan of spinach, the flavor was good and the heat gave it a nice kick and that she would be in favor of having it again. 

Saag Paneer - Schuler Version
Saag Paneer - Saveur Version
Credit: Todd Coleman
Another recipe down, not a full on success, but a great learning experience.  Once I have finished the 101 recipe challenge, I am certainly going to try my hand at cheese making, at least in some form (cheddar anyone...maybe I could change my basement into a cheese cellar?) and I am definitely interested in trying more Indian cuisine.

9 down, 92 to go.